This blog is a continuation of Part 1 and Part 2. If you wish to see the code for the website, feel free to check out the GitHub repo. Also, the final product is available here.
Features To Build
Picking up where we left off, I'm gonna walk through Features 11 through 20 from our table of contents (Features 1-10 should still link to the appropriate sections from Part 2).
- Style Of The Website Looks Just Like The Show (Or As Close To It As Possible)
- Everything On The Page Is Editable
- Player's Name (The Actual Person Sitting At The Table)
- Character's Name
- Short Description Of The Character (Including Age)
- Likes & Dislikes
- 6 Attributes With Dice Assignable To Each
- Attribute Modifiers
- RNG Rolls By Clicking On Dice (With Explosions!)
- Magic Vs Non-Magic Dice Rolls
- House Selection
- Broom Selection
- Wand Selection
- Adversity Token Counter
- Character Image (With Animation)
- Character Customization
- Mobile Friendly
- Export & Upload Characters
- Reset Character Button
- Credits Modal
House Selection
Within the Gowpenny Academy of Arcane Arts (the fictional school within Misfits & Magic), you can be sorted into one of four prominent houses:
- Hercinil - The hero house associated with a bird of prey and the color red
- Aqrabus - The cunning or "evil" house associated with a scorpion and the color green
- Messanteu - The smart house associated with a fox and the color blue
- Chimeron - The proletariat house associated with a goat and the color yellow
In my website, getting sorted into one of these prestigious houses is a pretty straight-forward process of
clicking on the
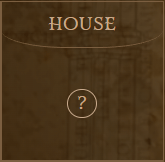
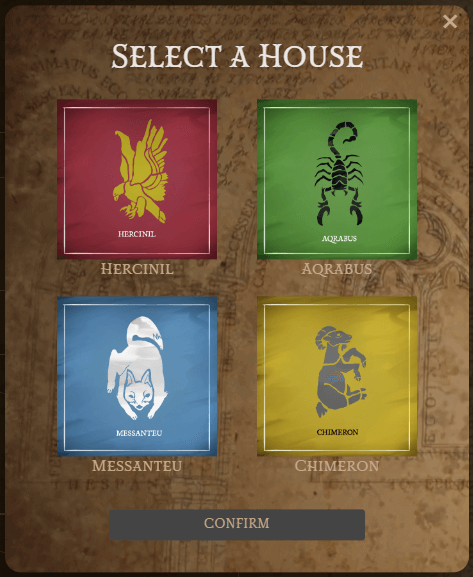
NOTE: As you probably noticed, selecting a house will also update your character's robe color... but I'll go into more detail about this feature later down in this blog
Broom Selection
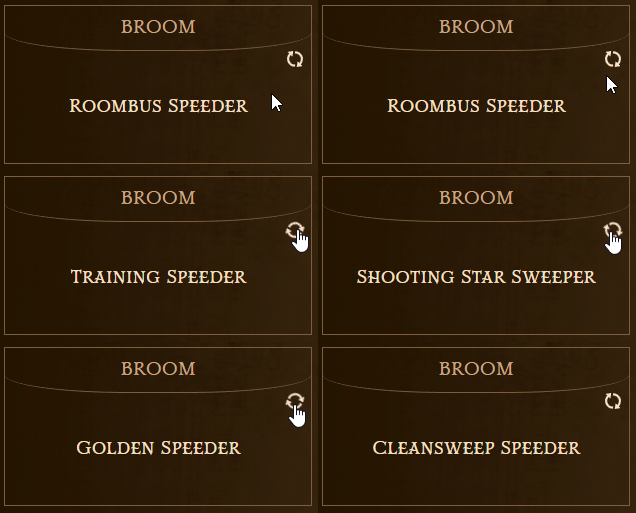
There wasn't much explanation in the show about how students selected their brooms, or even what kinds of brooms there are. So I put together a basic little "Broom Selector" that will randomly generate a name based off some potential broom sounding words:
Broom Name Generator Code
        const BroomPrefixes = ['The Suave', 'Cleansweep', 'Roombus', ...];
        const BroomSuffixes = ['Sweeper', 'Air', '9000', ...];

        function refreshBroom() {
            const prefix = BroomPrefixes[Math.floor(Math.random() * BroomPrefixes.length)];
            const suffix = BroomSuffixes[Math.floor(Math.random() * BroomSuffixes.length)];

            setCharacter((prevChar) => {
                return { ...prevChar, broom: `${prefix} ${suffix}` };
              });
        }
Wand Selection
In the show, getting your wand is a BIG DEAL...
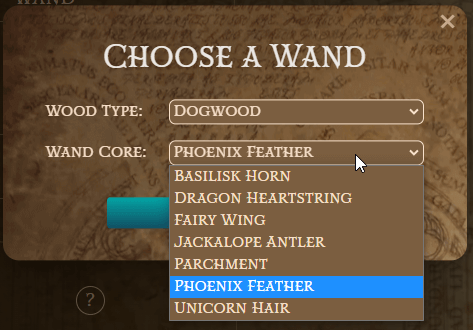
Unfortunately, I wasn't sure how to replicate this experience on the website 😅, so I kinda just went with what the Hogwarts Legacy game did and showed a few dropdowns where you can customize the wood type and wand core:
Adversity Token Counter
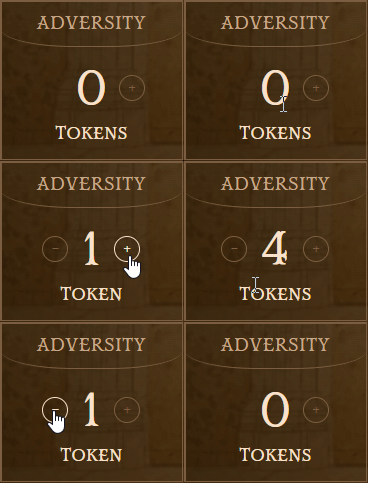
As you play the campaign, if you ever fail a roll you will be awarded something called Adversity Tokens. These
can be added to your (or your friends') saving rolls, so showing this counter for this number is pretty useful.
In the show, we never get a tracker for these tokens, and it can be a little confusing to see that one of the
students busts out
Character Image (With Animation)
Alright, now this is where the visuals of the project start to shine 🌞! In Misfits & Magic, there are a plethora of drawings provided by Adrián Ibarra Lugo (characters) and William Kirkby (maps). I had the goal of some basic character customization in mind, sort of like dressing up a character in a video game with different hats, hair styles, clothes, etc.
But I really wanted to keep things simple and within the theme of a "School of Magic". So to make my life infinitely easier, I chose to find a few characters (dressed in robes) from the Misfit & Magic's Fandom Wikipedia.
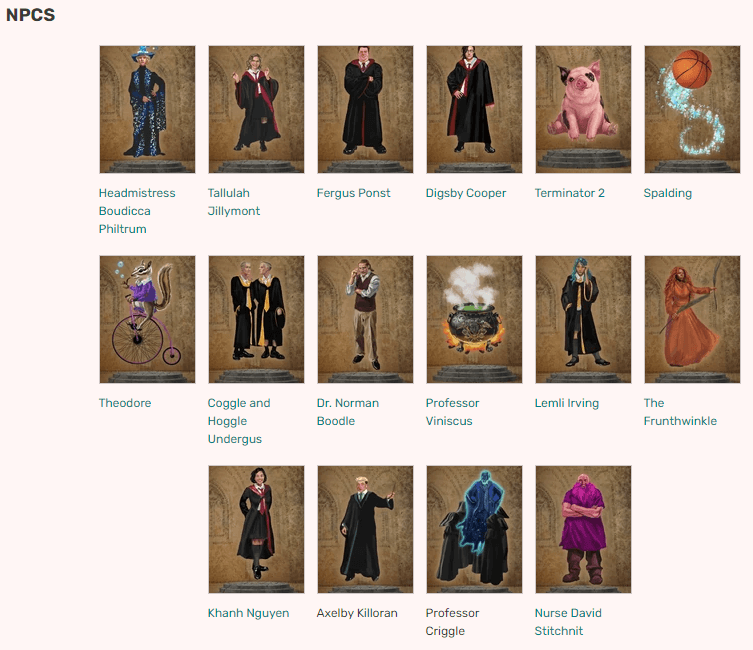
Every character I picked needed their outline and clothes traced out to delete the background. This was gonna take some time, so I busted out my headphones, put on some tunes, and got to work with my PhotoShop skills:
A few hours later, I had a few characters done and ready to go!

NOTE: The keen eyed among us will notice that I've updated the robe color from Red to Blue. I'll go into more detail about why this was necessary in the next section.
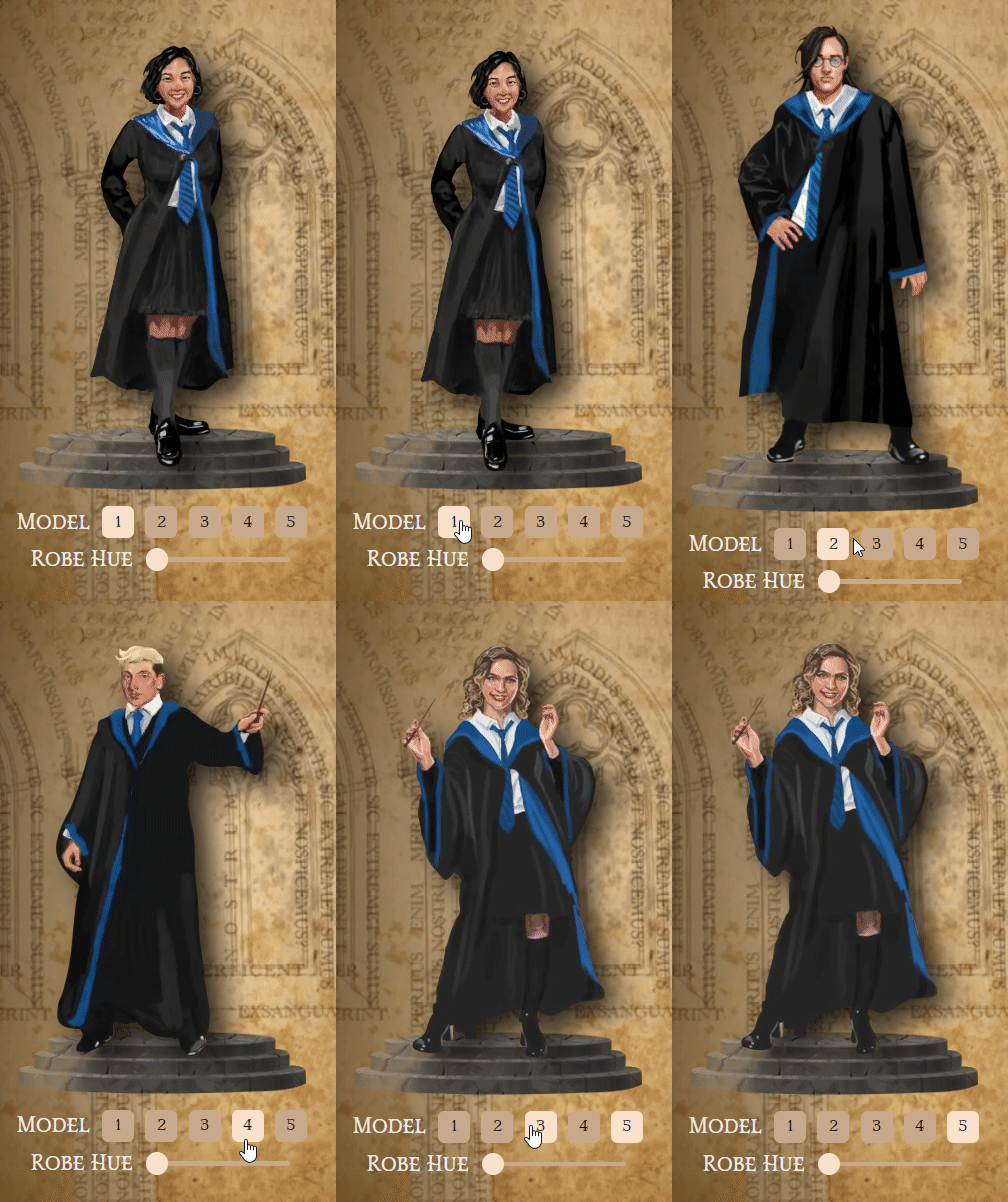
Adding this to the website, layered on top of the pedestal from Part 1, with a radio-button like selector for switching between characters came out really well 🤩! As a pièce de résistance, I added some life to the character with:
- A subtle animation of the character turning left and right, while also looking like it moved down the stairs.
-
Shadow casting on the background (and the pedestal) with
filter: drop-shadow(17px 13px 15px rgba(0,0,0,.8))
Character Customization
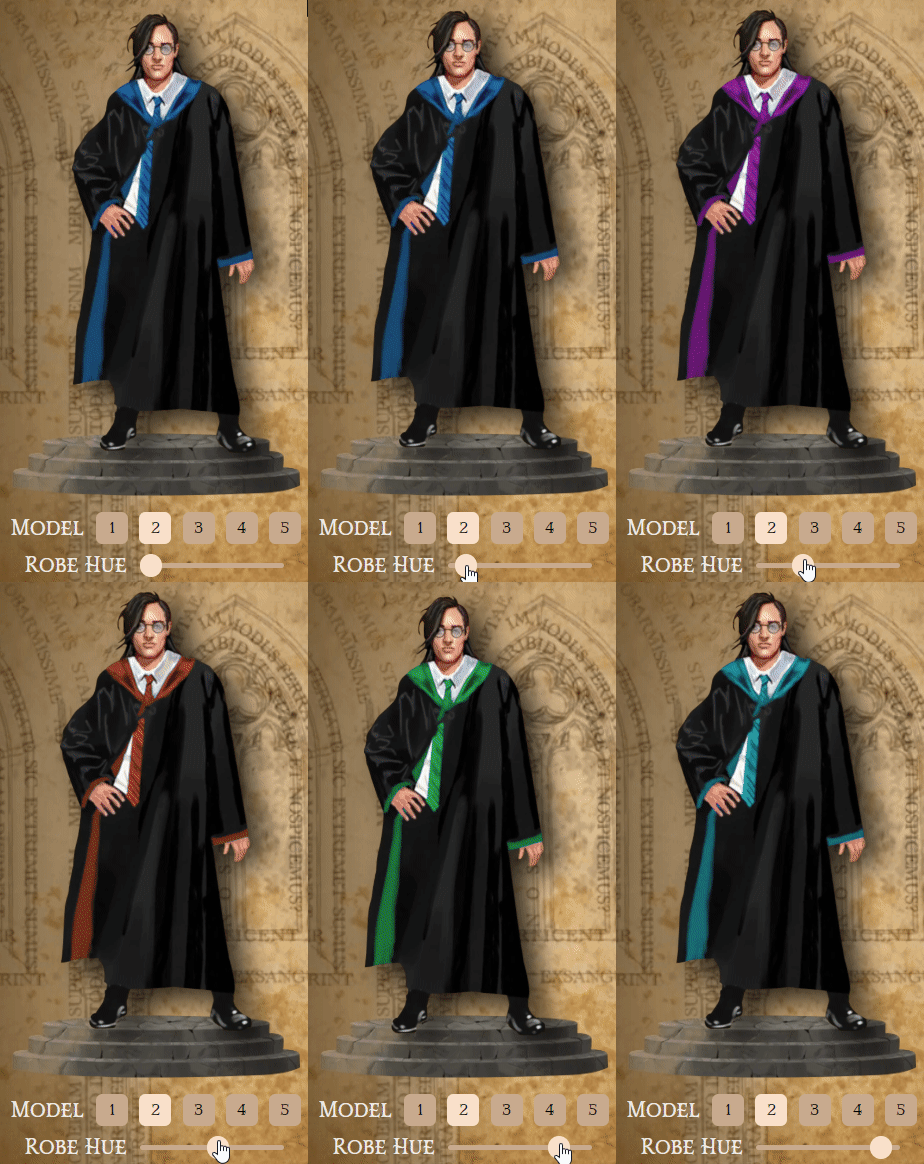
Okay, so here's where I had a crazy idea... What if you could customize the look of the character? What if we could change the robe color? Why stop there?? Why not the eye color or the hair?
Well, there's one big problem... these character images are
There are plenty of examples where people use their camera input in a webpage and remove/replace the green
pixels for a Green Screen effect. What if I just did the same? The only vibrant red in these character
Yeaaaahh, it was not easy. So a few things:
-
Displaying a
PNG image in HTML dynamically means you gotta use a<canvas> element. When you do this, the only pixel information you get isRGBA (Red, Green, Blue, Alpha). The image is accessible as a very largeArray of numbers, where every four values in a row represents the Red, Green, Blue, and Alpha of a single pixel.for (let i = 0; i < imageData?.data.length; i += 4) { const red = imageData.data[i]; const green = imageData.data[i + 1]; const blue = imageData.data[i + 2]; const alpha = imageData.data[i + 3]; ... }
-
Turns out the skin color of most characters has a lot of red. So attempting to use the
R inRGBA is out. I went with blue instead, as skin can also have green undertones. Once again, I had to re-edit the character images, manually create paths selecting the colored robes/ties, and hue shift all colors to a vibrant blue. We'll also want to manually filter out pixels with a high amount of red, as it's probably skin:red < 75
-
Just trying to select "vibrant blue" pixels is not gonna work because we only have
RGBA values. If we only look for pixels with a high blue value, it will include all of the dark gray pixels. We have a way around this, since each character is only wearing black robes with a white shirt, we can ignore all "grayscale" pixels:Math.max(red, green, blue) - Math.min(red, green, blue) > 20
-
Also, we can't use the same thresholds for "vibrant blue" with the shadows, mid-tones, and highlights of the
images. To accommodate for this, we'll need to use different thresholds of blue:
(red > 150 && blue > 250) || // highlights
            (red < 200 && blue > 190)    // mid-tones
-
Once we finally select all the "vibrant blue" pixels, you can't just change them to a new color because
of the highlights and shadows. So I had to convert each
RGB pixel intoHSL (Hue, Saturation, and Lightness). Then complete a hue shift to make it a different color, but maintain the saturation and light levels. Finally, convert theHSL pixel back intoRGB for the<canvas> element.Sample Hue Shift Code interface RGB { r: number, g: number, b: number }; interface HSL { h: number, s: number, l: number }; function changeHue(rgb: RGB, degree: number): RGB { var hsl = rgbToHSL(rgb); hsl.h += degree; if (hsl.h > 360) { hsl.h -= 360; } else if (hsl.h < 0) { hsl.h += 360; } return hslToRGB(hsl); }
Okay, let's put all of those painfully learned lessons together and here's what we get:
var canvas = document.getElementById('character-canvas') as HTMLCanvasElement;
          var ctx = canvas.getContext('2d', {
              willReadFrequently: true, // Necessary for performance
          } as CanvasRenderingContext2DSettings);
          var img = new Image;
          img.src = character.model.imageUrl; // Load chosen character model
          img.onload = function () {
            canvas.width = img.width;
            canvas.height = img.height;
            ctx?.drawImage(img, 0, 0, img.width, img.height);
            const imageData = ctx?.getImageData(0, 0, canvas.width, canvas.height);

            if (imageData?.data == undefined) { return; }

            // Change colors based on Robe Hue color
            for (let i = 0; i < imageData?.data.length; i += 4) {
              const red = imageData.data[i];
              const green = imageData.data[i + 1];
              const blue = imageData.data[i + 2];
              const alpha = imageData.data[i + 3];

              // If clear pixel, skip logic for performance
              if (alpha < 100) { continue; }

              // Currently set to only work if the original image has BLUE as the main house colors, expects
              // the robes to be in grayscale, and the skin color has a natural, green undertone.
              if (
                Math.max(red, green, blue) - Math.min(red, green, blue) > 20 && // Exclude grayscale pixels
                (
                  red < 75 || // Exclude skin tones
                  (red > 150 && blue > 250) || // highlights
                  (red < 200 && blue > 190) // mid-tones
                ) &&
                blue > 40) {
                // Update the color of the blue pixels
                // This should be done with a hue shift/rotate to maintain the highlights/shadows of the original image
                const newRGB = changeHue({ r: red, g: green, b: blue }, character.robeColorHue);

                imageData.data[i] = newRGB.r;
                imageData.data[i + 1] = newRGB.g;
                imageData.data[i + 2] = newRGB.b;
                }
            }

            ctx?.putImageData(imageData, 0, 0);
          }
Mobile Friendly
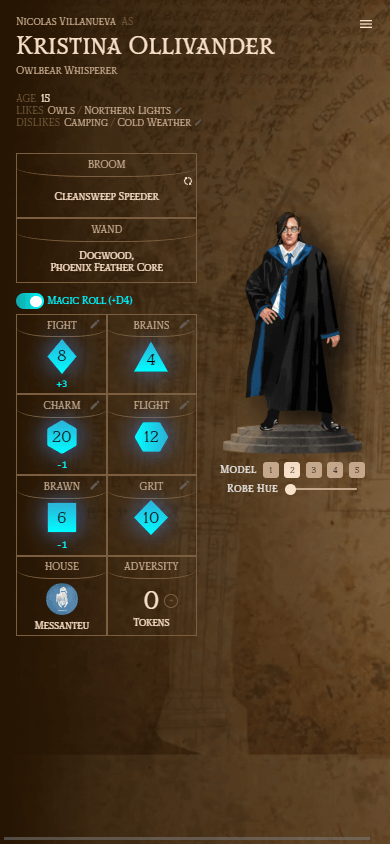
As I was creating the website, I really wanted to make sure it was gonna work on cell phone screens just as well as a laptop. Here are the things I did to make that easily achievable:
-
All CSS measurements were done in
em and notpx . That way only updating thefont-size will appropriately size 95% of the app:html { font-size: 8px; } -
Use
SVG images instead of static images wherever possible -
Use
display: grid to change the number of columns and rows easily
Export & Upload Characters
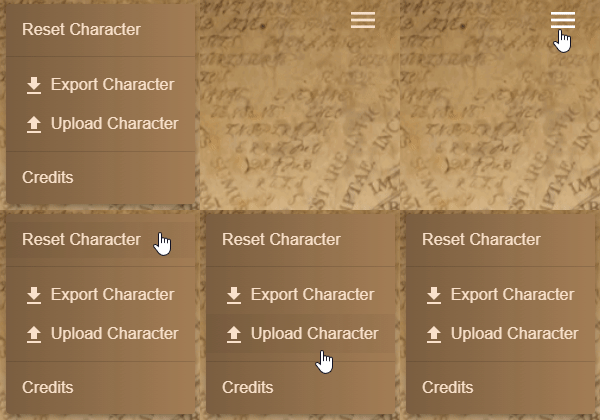
Behind the scenes of the website, the entire character information is being stored as a large
So I added a menu button on the top-right for a dialog to keep extra features from cluttering the UI, and added
Reset Character Button
This one was pretty easy once I had the ability to export and upload characters. Here's the default values I've setup:
export const DefaultCharacter: Character = {
          displayName: 'Kristina Ollivander',
          owner: 'Nicolas Villanueva',
          description: 'Owlbear Whisperer',
          age: 15,
          likes: ['Owls', 'Northern Lights'],
          dislikes: ['Camping', 'Cold Weather'],
          model: CharacterModels.filter(cm => cm.id == 1)[0],
          broom: 'The Suave Sweeper',
          robeColorHue: 160,
          adversityTokens: 0,
          brains: { diceType: DiceType.D4 },
          brawn: { diceType: DiceType.D6, modifier: -1 },
          fight: { diceType: DiceType.D8, modifier: 3 },
          flight: { diceType: DiceType.D12 },
          grit: { diceType: DiceType.D10 },
          charm: { diceType: DiceType.D20, modifier: -1 },
      }
Credits Modal
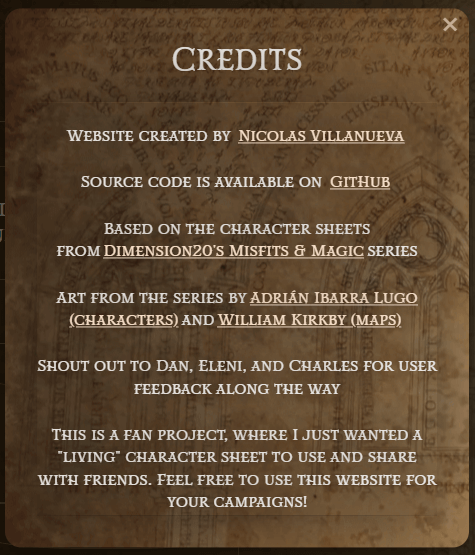
The final feature was to have a screen acknowledging all of the hard work that went into this website:
- Link to the GitHub repo
- The team from Misfits & Magic for their world building and designs
- Friends that helped me test and QA the website along the way
Final Thoughts
This project lasted ~2 weeks and I'm super pleased with the final product! I learned a lot about React and
TypeScript/CSS along the way. I decided to
post this to the

Please check out the website yourself and make your own Misfits & Magic character!
I also just discovered that the entire first episode of Misfits & Magic was released on YouTube for free: Watch Here! Maybe as you watch, you'll get a better sense of how a tool like this character sheet could really come in handy for anyone trying to run a similar campaign at home.
Best,
nv


